Roof flashing plays a crucial role in protecting your home from water damage. It’s the material used to direct water away from critical areas of your roof, such as joints and chimneys, ensuring that your roof remains watertight. However, over time, roof flashing can become damaged or worn out, leading to potential leaks and other issues. Knowing the signs that your roof flashing needs repair is essential for maintaining the integrity of your home. In this blog, we’ll explore the key indicators that your roof flashing might be in need of attention and what steps you should take to address the issue.
Signs Your Roof Flashing Needs Repair
1. Visible Cracks or Gaps
One of the most obvious signs that your roof flashing needs repair is the presence of visible cracks or gaps. Inspect your roof flashing for any noticeable damage. Cracks can occur due to aging materials, harsh weather conditions, or poor installation. Gaps between the flashing and the roof or surrounding materials can also indicate that the flashing is no longer providing a secure barrier against water infiltration.
2. Rust or Corrosion
Metal roof flashing, commonly made from aluminum, steel, or copper, is susceptible to rust and corrosion. If you notice any signs of rust or corrosion on your flashing, it’s a strong indication that the material is deteriorating. Rust can weaken the flashing, leading to potential leaks and compromised roof integrity. Regularly check metal flashing for any signs of corrosion and address them promptly.
3. Loose or Detached Flashing
Roof flashing should be securely attached to your roof and other components. If you find that the flashing is loose or detached, it may no longer be effectively channeling water away from vulnerable areas. This can be caused by improper installation, physical damage, or degradation over time. Ensure that the flashing is properly fastened and sealed to prevent water from seeping into your home.
4. Water Stains or Leaks Inside Your Home
One of the most concerning signs of roof flashing issues is the presence of water stains or leaks inside your home. If you notice water spots on your ceilings or walls, especially near chimneys, skylights, or roof joints, it may indicate that your roof flashing is not performing its job correctly. Water stains are a clear indication that water is penetrating your roof and finding its way into your living spaces.
5. Damaged Sealant or Caulking
Sealant or caulking around roof flashing helps to create a watertight seal. Over time, sealant can degrade, crack, or peel away, reducing its effectiveness. If you observe damaged or missing sealant around your flashing, it may be time for a repair. Properly applied sealant is essential for maintaining the integrity of the flashing and preventing leaks.
6. Shingle Damage Near Flashing
Inspect the area around your flashing for any signs of damage to the shingles or roofing material. Missing, cracked, or curled shingles near the flashing can indicate that the flashing is not properly protecting these areas. Shingle damage can lead to water infiltration and further complications if not addressed promptly.
7. Increased Energy Bills
While not as direct as other signs, an increase in your energy bills could be a result of roof flashing issues. If your roof is not properly sealed and insulated due to damaged flashing, it can lead to higher heating and cooling costs. Insufficient insulation and drafts from roof leaks can cause your HVAC system to work harder, resulting in increased energy expenses.
8. Mold or Mildew Growth
Mold and mildew thrive in damp environments. If you notice mold or mildew growth in your attic or around roof areas, it could be a sign of flashing problems. Leaks caused by damaged flashing can create the perfect conditions for mold to develop, leading to potential health risks and structural damage.
Signs of Damaged Roof Flashing
1. Clogged or Overflowing Gutters
Gutters that are clogged or overflowing may be an indirect sign of roof flashing issues. If the flashing is not properly directing water away from your roof, it can lead to an excessive buildup of water in your gutters. Check your gutters for signs of blockage or overflow, and consider whether flashing issues might be contributing to the problem.
2. Buckled or Warped Flashing
Flashings that are buckled or warped are indicative of underlying problems. Extreme weather conditions, such as high winds or intense heat, can cause flashing to become distorted. Warped flashing may not be effectively channeling water away from your roof, leading to potential leaks and damage.
3. Inconsistent Roof Slope
If you notice that the slope of your roof appears inconsistent or uneven, it may be related to flashing issues. Properly installed flashing helps maintain a consistent slope and directs water away from vulnerable areas. An uneven roof slope can indicate that the flashing is not functioning as intended.
4. Worn Out Flashing Materials
Different types of flashing materials have varying lifespans. For instance, asphalt-based flashing may deteriorate faster than copper flashing. If you have flashing that appears worn out or degraded, it’s important to consider replacing it with new materials to ensure continued protection for your roof.
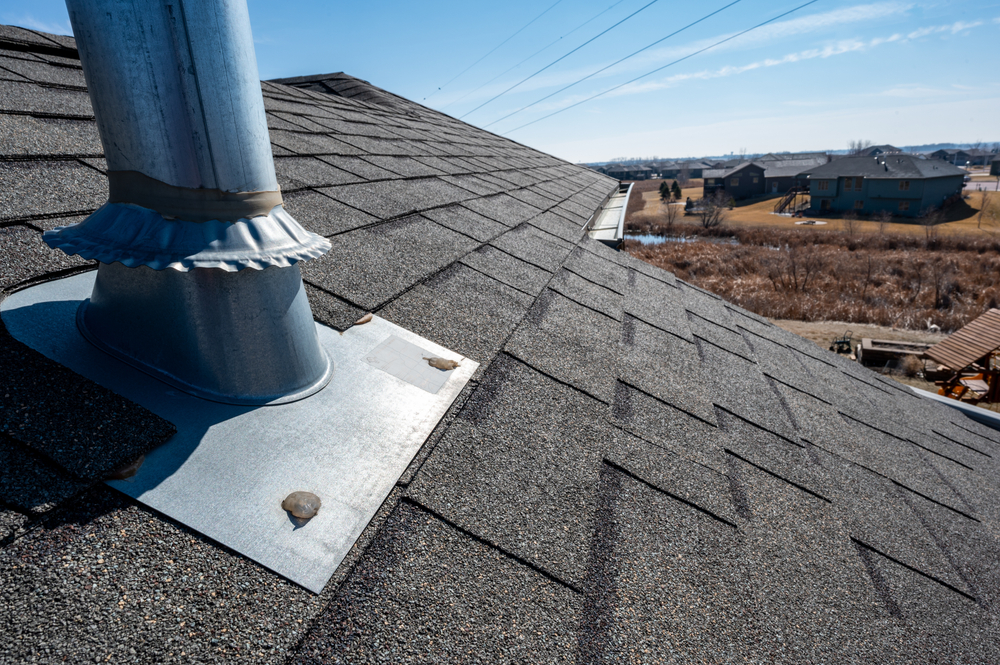
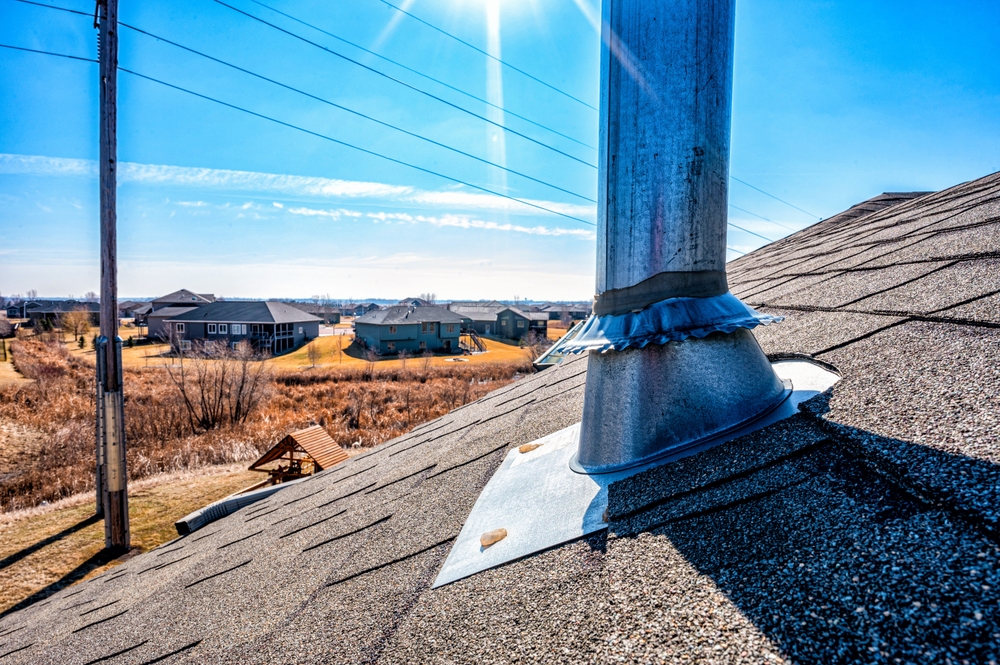
5. Deterioration Around Roof Penetrations
Roof penetrations, such as vents, chimneys, and skylights, are common areas where flashing is used to prevent leaks. If you notice deterioration or damage around these penetrations, it may indicate that the flashing is failing to provide a proper seal. Inspect these areas closely and address any signs of wear or damage.
What to Do If You Spot Roof Flashing Issues
If you identify any of the signs mentioned above, it’s important to take action to address the issue promptly. Here are some steps you can take:
Conduct a Thorough Inspection: Regularly inspect your roof flashing for signs of damage or wear. Early detection can help prevent more extensive and costly repairs.
Consult a Professional Roofer: If you’re unsure about the condition of your roof flashing or if you notice significant damage, it’s best to consult a professional roofer. They can assess the situation, recommend appropriate repairs or replacements, and ensure that the job is done correctly.
Perform Regular Maintenance: Regular maintenance of your roof flashing can help prolong its lifespan and prevent issues. This includes cleaning gutters, checking sealant, and ensuring that flashing is securely attached.
Consider Upgrading Materials: If your current flashing materials are outdated or deteriorating, consider upgrading to more durable options. Modern flashing materials offer improved performance and longevity.
Conclusion
Roof flashing is a critical component of your roofing system, and its proper function is essential for preventing water damage and maintaining the structural integrity of your home. By being aware of the signs that your roof flashing needs repair and taking prompt action when issues arise, you can help protect your home and avoid more extensive and costly repairs in the future. Regular inspections, timely repairs, and professional maintenance are key to ensuring that your roof flashing remains in good condition and continues to safeguard your home from the elements.
Need a Roofing Contractor in Minneapolis-St. Paul, MN?
Established in 2008, K. and M. Construction is your trusted Twin Cities metro area expert for all things exterior residential. We specialize in storm damage restoration, including hail damage repair and metal roof replacement. Our team boasts over 35 years of combined experience ensuring top-notch work on your roof, siding, windows, and gutters. We take pride in exceeding expectations and providing exceptional customer service. Contact us today and let us transform your home’s exterior!
Roof flashing is a crucial component in the architecture of a building, designed to protect your home from water damage and ensure its longevity. Understanding roof flashing, its types, and its importance can help homeowners maintain their property better and avoid costly repairs.
Definition and Purpose
Roof flashing refers to thin strips of metal or other materials installed on the roof to direct water away from critical areas of a building. It is placed around joints, seams, and other vulnerable spots where the roof meets other structures, such as chimneys, skylights, or vents. The primary purpose of roof flashing is to prevent water infiltration that could lead to leaks and damage within the home.
Types of Roof Flashing
There are several types of roof flashing, each designed to address specific areas and needs:
Step Flashing
Step flashing is used where the roof meets a vertical surface, such as a wall. It consists of overlapping pieces that form a “step-like” pattern. This type of flashing is crucial for preventing water from seeping behind the shingles and causing damage to the underlying structure.
Continuous Flashing
Continuous flashing, also known as apron flashing, is a single piece of flashing that extends along the length of a roof-to-wall intersection. It helps create a continuous barrier against water infiltration and is typically used in areas where the roof meets a vertical surface, such as a wall or a dormer.
Valley Flashing
Valley flashing is installed in the V-shaped valleys formed where two roof planes intersect. It is designed to channel water down the roof and into the gutters, preventing it from pooling in these areas and causing damage.
Counter Flashing
Counter flashing is installed over step flashing to provide an additional layer of protection. It is often used in areas where the roof meets a chimney or wall. Counter flashing helps ensure that water cannot penetrate behind the step flashing.
Chimney Flashing
Chimney flashing is specifically designed for the area where the chimney intersects with the roof. It typically consists of both step and counter flashing to create a watertight seal around the chimney.
Materials Used for Roof Flashing
Roof flashing can be made from various materials, each with its advantages and disadvantages:
Aluminum
Aluminum is a popular choice for roof flashing due to its durability and resistance to corrosion. It is lightweight and easy to work with but may not be as long-lasting as other materials.
Copper
Copper flashing is highly durable and has a long lifespan. It is resistant to corrosion and can develop a patina that blends well with many roofing materials. However, copper is more expensive than other options.
Steel
Steel flashing is strong and affordable but is prone to rust if not properly coated. It is often used in commercial buildings and can be treated to improve its longevity.
Lead
Lead flashing is highly flexible and can be molded to fit complex shapes. It is very durable but less commonly used due to concerns about lead toxicity and environmental impact.
Installation and Maintenance
Proper installation and maintenance of roof flashing are crucial for its effectiveness. Here are some key points to consider:
Professional Installation
While some homeowners may attempt to install roof flashing themselves, it is often best to hire a professional. Proper installation ensures that the flashing is correctly placed and sealed, reducing the risk of leaks and damage.
Regular Inspections
Regular inspections of roof flashing are important to identify any signs of wear or damage. Check for issues such as cracks, rust, or separation from the roof. Addressing these problems promptly can prevent more serious issues from developing.
Cleaning
Keeping roof flashing clean and free of debris helps maintain its functionality. Leaves, dirt, and other materials can obstruct water flow and cause damage. Regularly clean the areas around the flashing to ensure it operates effectively.
Why Is Roof Flashing Important?
Roof flashing plays a vital role in protecting your home from water damage. Here are some key reasons why roof flashing is important:
Prevents Water Damage
The primary function of roof flashing is to prevent water from infiltrating vulnerable areas of the roof. Without proper flashing, water can seep into the structure, causing damage to insulation, drywall, and other materials. This can lead to mold growth, rot, and expensive repairs.
Enhances Roof Longevity
Properly installed and maintained flashing helps extend the lifespan of your roof. By directing water away from critical areas, flashing reduces the risk of premature wear and damage, allowing your roof to last longer and perform better.
Protects Structural Integrity
Water infiltration can compromise the structural integrity of your home. Roof flashing helps protect the underlying structure by ensuring that water is directed away from areas where it could cause damage. This helps maintain the stability and safety of your home.
Improves Energy Efficiency
When water infiltrates the home, it can lead to increased energy costs due to decreased insulation effectiveness and the need for additional heating or cooling. By preventing water damage, roof flashing helps maintain the efficiency of your home’s insulation and HVAC systems.
Prevents Mold and Mildew
Moisture infiltration can lead to mold and mildew growth, which can be harmful to your health and damaging to your home. Roof flashing helps prevent these issues by keeping water out of critical areas and reducing the risk of mold growth.
Conclusion
Roof flashing is a critical component of a well-maintained roof, providing essential protection against water damage and contributing to the overall longevity and efficiency of your home. By understanding what roof flashing is, the different types available, and its importance, homeowners can better care for their roofs and prevent costly repairs.
Regular inspections, professional installation, and proper maintenance of roof flashing are key to ensuring its effectiveness. By taking these steps, you can help protect your home from water damage and enjoy the peace of mind that comes with a well-maintained roof.
Need a Roofing Contractor in Minneapolis-St. Paul, MN?
Established in 2008, K. and M. Construction is your trusted Twin Cities metro area expert for all things exterior residential. We specialize in storm damage restoration, including hail damage repair and metal roof replacement. Our team boasts over 35 years of combined experience ensuring top-notch work on your roof, siding, windows, and gutters. We take pride in exceeding expectations and providing exceptional customer service. Contact us today and let us transform your home’s exterior!
Hailstorms can be both sudden and severe, leaving behind a trail of damage to homes and properties. If your home has been affected by a hailstorm, filing an insurance claim promptly is crucial. This article explores the reasons why timely filing is essential and answers the common question: “How long do I have to file a hail damage claim for my roof?”
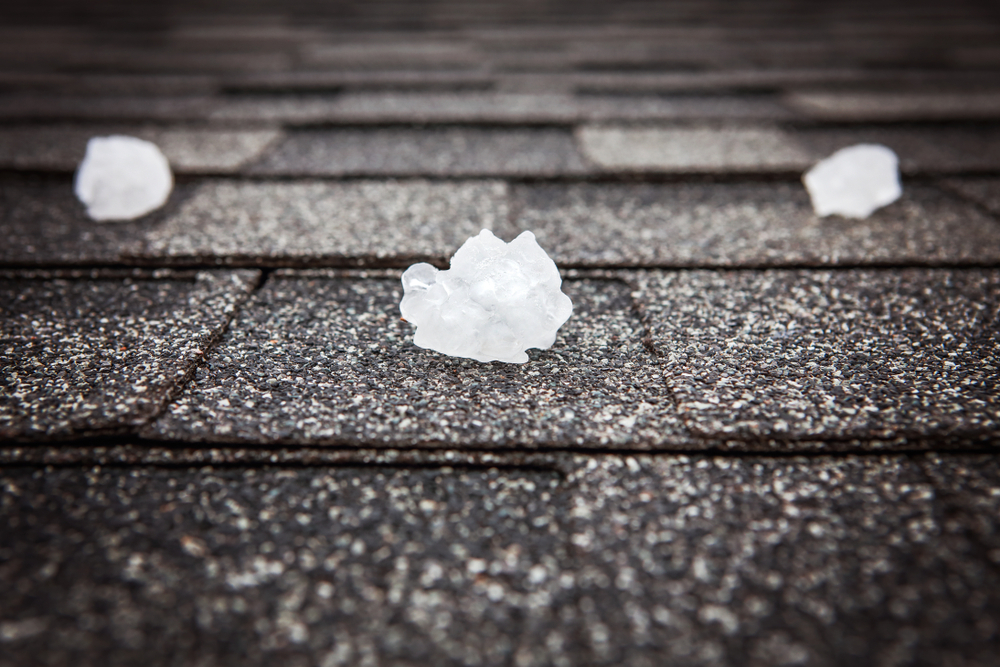
Understanding Hail Damage
Hail can cause extensive damage to various parts of your home, from your roof to your siding and windows. The impact of hailstones can lead to:
Dents and Cracks: On your roof and siding.
Shattered Windows: Resulting from large hailstones.
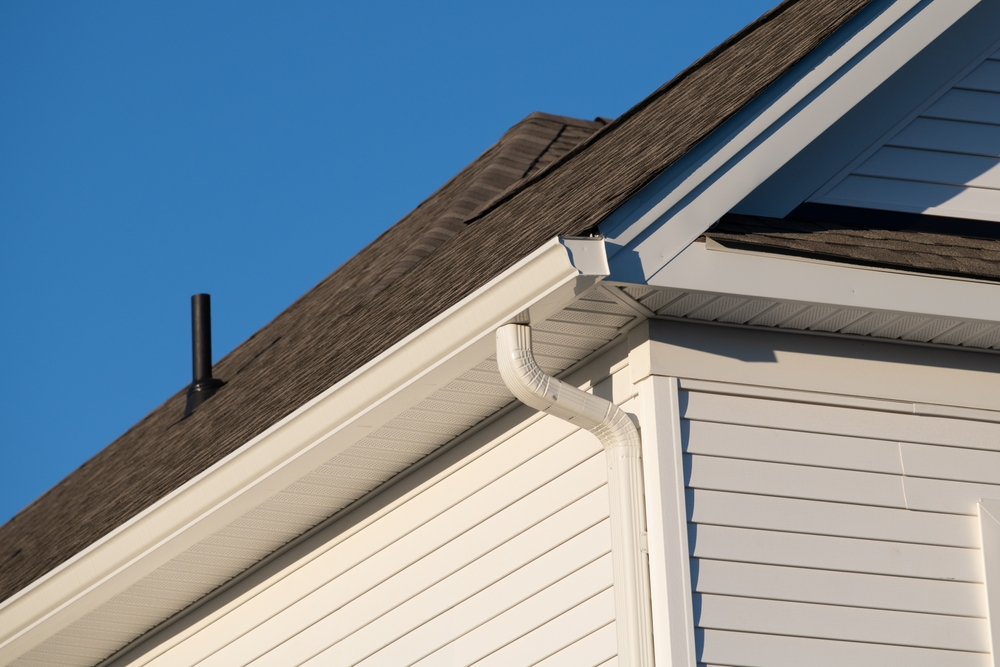
Gutters and Downspouts: Potentially being damaged or clogged.
Given the potential for widespread damage, it’s important to understand why a prompt insurance claim is necessary.
Common Types of Hail Damage
Roof Damage: Hailstones can create dents in shingles, which can compromise their integrity and lead to leaks. Larger hailstones can crack or completely break shingles, requiring prompt repair or replacement.
Siding Damage: Vinyl or aluminum siding can be punctured or cracked by hail. This can affect the insulation and aesthetic appeal of your home, and if left unchecked, can lead to more significant problems.
Window Damage: Hail can cause windows to crack or shatter. Broken windows can lead to water damage and security issues if not repaired immediately.
Gutter and Downspout Damage: Hail can cause gutters to become bent or disconnected, leading to poor drainage and potential water damage to the foundation of your home.
The Importance of Promptly Filing an Insurance Claim
1. Avoiding Further Damage
One of the most critical reasons to file a claim quickly is to prevent further damage. If hail damage is left unaddressed, it can lead to:
Leaks: Damaged roofs or siding can lead to leaks, resulting in interior water damage. Water leaks can affect ceilings, walls, and floors, causing mold growth and requiring extensive repairs.
Structural Issues: Prolonged exposure to the elements can exacerbate damage and affect the structural integrity of your home. For example, a compromised roof can lead to sagging or collapse if not repaired promptly.
Increased Repair Costs: The longer you wait, the more extensive the repairs might become, increasing the overall cost. For instance, water damage from a leaking roof can cause additional damage to insulation and wood framing, escalating the repair expenses.
2. Meeting Insurance Deadlines
Don’t wait to file an insurance claim after hail damage. Insurance policies typically have deadlines for filing claims. Missing these deadlines can result in:
Claim Denial: Your insurance company might deny your claim if it is not filed within the required timeframe. Most policies have a statute of limitations, and failing to adhere to it can jeopardize your claim.
Reduced Coverage: Some policies may offer limited coverage if claims are not made promptly. This means you might not receive full compensation for the repairs needed.
Understanding the specific deadlines outlined in your policy is crucial to ensure that you remain eligible for coverage. Insurance companies are stringent about deadlines to prevent fraudulent claims and manage their risk exposure.
3. Securing Your Claim with Evidence
Timely filing also allows you to gather and present accurate evidence of the damage. This includes:
Photographic Evidence: Documenting the damage with photos or videos. High-quality images showing the extent of the damage will help substantiate your claim.
Repair Estimates: Getting estimates from contractors for the cost of repairs. Detailed estimates from professionals provide a basis for the compensation you seek.
Witness Statements: If applicable, statements from neighbors or professionals who can attest to the damage. Witnesses can provide additional support for your claim.
The longer you wait, the more difficult it can be to gather reliable evidence, which might impact the approval of your claim. Evidence can become less reliable over time as repairs might begin or damage might worsen.
How Long Do I Have to File a Hail Damage Claim for My Roof?
The timeframe to file a hail damage claim for your roof can vary depending on your insurance policy and location. However, most policies require you to file a claim within a specific period after the damage occurs. Here’s a general guide:
1. Check Your Policy
Insurance policies often have different deadlines for filing claims. Common timeframes include:
30 to 60 Days: Many policies require that claims be filed within 30 to 60 days of the damage. This short window helps insurers manage claims effectively and prevents long-term complications.
1 Year: Some policies may provide up to one year to file a claim. This extended period offers more flexibility, but it’s still advisable to file as soon as possible to prevent additional issues.
It’s essential to review your policy or contact your insurance company to determine the exact timeframe for filing a claim. Policies can vary, so understanding your specific requirements is key.
2. Consider Local Regulations
In some regions, local regulations or state laws might affect the timeframe for filing an insurance claim. For example:
State-Specific Regulations: Certain states have laws that may extend or shorten the typical filing period based on local conditions or regulations.
Emergency Declarations: In cases where a state of emergency is declared, there might be specific provisions or extensions for filing insurance claims.
Familiarize yourself with any local requirements that might impact your claim. Consulting with a local insurance agent or attorney can provide clarity on applicable laws.
3. Act Quickly
Even if you have several months to file a claim, it’s advisable to act quickly. This ensures that you can start the repair process sooner and mitigate further damage. Early action helps:
Accelerate Repairs: Quick filing allows contractors to begin repairs sooner, reducing the risk of additional damage.
Facilitate Insurance Processing: The sooner you file, the quicker the insurance company can process your claim and disburse funds for repairs.
Minimize Disruptions: Addressing damage promptly can reduce the impact on your daily life and living conditions.
Steps to Take When Filing a Hail Damage Insurance Claim
1. Document the Damage
Immediately after the hailstorm, start documenting the damage. This documentation is crucial for your claim and includes:
Photographic Evidence: Take clear, detailed photos of all affected areas, including the roof, siding, windows, and any interior damage. Ensure you capture multiple angles and close-ups of significant damage.
Videos: Short video clips can provide a more comprehensive view of the damage and highlight areas that might be harder to photograph.
Detailed Notes: Make notes about the date and time of the hailstorm, the size of the hailstones (if known), and any other relevant details.
2. Contact Your Insurance Company
Notify your insurance company about the hail damage as soon as possible. Provide them with:
A Description of the Damage: Include details about the extent of the damage and any immediate concerns. Be specific about what you have observed and any immediate actions taken.
Evidence: Submit the photos, videos, and repair estimates you’ve gathered. Ensure that all evidence is well-organized and clearly labeled.
3. Get Professional Assessments
Have a professional roofer or contractor assess the damage and provide an estimate for repairs. This assessment will be crucial for your insurance claim. The steps include:
Inspection: A professional inspection will determine the full extent of the damage and identify any underlying issues that need addressing.
Estimates: Obtain written estimates for the cost of repairs. Multiple estimates can provide a range of costs and help ensure that you receive fair compensation.
Recommendations: Follow any recommendations provided by the inspector regarding necessary repairs and maintenance.
4. Follow Up
Stay in contact with your insurance company throughout the claims process. Ensure that all required documents are submitted and address any questions or concerns they might have. Actions to consider include:
Regular Check-Ins: Periodically check the status of your claim and follow up on any pending issues.
Communication: Maintain open lines of communication with your insurance adjuster and provide any additional information or documentation requested.
Documentation: Keep records of all communications with your insurance company, including emails, phone calls, and correspondence.
Conclusion
Promptly filing your hail damage insurance claim is essential for several reasons. Don’t wait to file an insurance claim after hail damage to avoid complications, secure your coverage, and prevent additional damage. By understanding the importance of timely filing and the specific deadlines associated with your policy, you can navigate the claims process more effectively.
Remember, acting quickly not only helps in managing repairs but also ensures that your insurance coverage remains intact. So, if your home has suffered from a hailstorm, take the necessary steps to file your claim as soon as possible and protect your property from further harm.
Need a Roofing Contractor in Minneapolis-St. Paul, MN?
Established in 2008, K. and M. Construction is your trusted Twin Cities metro area expert for all things exterior residential. We specialize in storm damage restoration, including hail damage repair and metal roof replacement. Our team boasts over 35 years of combined experience ensuring top-notch work on your roof, siding, windows, and gutters. We take pride in exceeding expectations and providing exceptional customer service. Contact us today and let us transform your home’s exterior!
Roofs are designed to withstand a variety of weather conditions, but severe storms can challenge even the most robust roofing systems. Identifying storm damage early can prevent more serious problems down the road. Here’s an in-depth look at common signs that your roof may have sustained damage during a storm.
1. Missing or Damaged Shingles
Shingles on the Ground
One of the most direct indicators of roof damage is finding shingles on the ground around your property. High winds can easily lift shingles off the roof, leaving them scattered on the ground. If you notice a significant number of shingles or parts of shingles around your home, it’s a clear sign that your roof has been compromised.
Cracked or Broken Shingles
Shingles can crack or break due to intense wind pressure or hail. When inspecting your roof, look for visible cracks or splits in the shingles. Damaged shingles not only compromise the roof’s ability to keep water out but can also lead to further issues if not addressed promptly.
Bald Spots
Granules on shingles act as a protective layer against UV rays and weather elements. When shingles are damaged by storms, the granules can be dislodged. Check for bald spots where granules are missing. These areas are more susceptible to further damage and may need to be replaced.
2. Leaks and Water Stains
Water Stains on Ceilings and Walls
One of the most concerning signs of roof damage is water infiltration. After a storm, check your ceilings and walls for water stains. These stains often appear as brown or yellowish patches and indicate that water is penetrating through the roof. Water stains can also suggest leaks in your roof that need immediate attention.
Drips and Puddles in the Attic
Inspect your attic for any signs of water entry. Look for drips, puddles, or damp areas. If your attic insulation is wet or there are signs of water damage on the attic floor, it’s a strong indication that your roof has been compromised.
3. Granules in Gutters
Accumulation of Granules
Shingles are coated with granules that help protect them from the elements and add durability. Storms, especially those involving hail, can dislodge these granules. If you notice a significant amount of granules in your gutters, it’s a sign that the shingles may be damaged. Over time, this can lead to decreased effectiveness of the shingles and potential leaks.
4. Bent or Broken Roof Vents and Flashing
Bent or Misaligned Vents
Roof vents are crucial for proper ventilation in your home, allowing for the escape of hot air and moisture. High winds can bend or misalign these vents. Inspect your roof vents to see if they appear bent, cracked, or out of place. Properly functioning vents are essential for maintaining a healthy roof and attic environment.
Damaged Flashing
Flashing is used to seal joints and prevent water from seeping into vulnerable areas around chimneys, skylights, and vents. Storms can cause flashing to become bent, cracked, or detached. Check the flashing around these areas for signs of damage. Any issues with flashing should be repaired promptly to prevent leaks.
5. Sagging Roof Deck
Uneven Roof Areas
A sagging roof deck can be a serious issue, often resulting from prolonged water damage or structural problems. Inspect your roof from the ground and look for any areas that appear to be sagging or uneven. A sagging roof can indicate a weakened structure that may require immediate attention from a professional.
Visible Warping
In addition to sagging, warping of the roof deck is another sign of damage. Look for areas where the roof appears to be bending or distorting. Warping can compromise the roof’s structural integrity and may require significant repairs.
6. Cracked or Dented Roof
Dents and Dings from Hail
Hailstorms can leave noticeable dents and dings on your roof. Inspect your roof for any such damage, which can be more apparent on metal roofs but may also affect shingles. Hail damage can reduce the effectiveness of roofing materials and may lead to leaks if not repaired.
Cracks in Roofing Material
Cracks in the roofing material, whether shingles or tiles, are another sign of storm damage. Examine your roof for any visible cracks or splits that may have resulted from strong winds or hail. Cracked roofing materials need to be repaired or replaced to prevent water infiltration.
7. Loose or Damaged Gutters
Detached Gutters
Gutters play a critical role in directing rainwater away from your home. Storms can cause gutters to become loose or detached from the house. Check your gutters for any signs of detachment or looseness. Properly functioning gutters are essential for preventing water damage to your home’s foundation and landscaping.
Clogs and Debris
Debris such as leaves, branches, and other materials can clog gutters, especially after a storm. Inspect your gutters for any clogs or accumulation of debris. Clogged gutters can cause water to overflow, leading to potential damage to your roof and home.
8. Increased Energy Bills
Insulation Issues
Storm damage can affect your roof’s insulation, leading to increased energy bills. If you notice a sudden spike in your heating or cooling costs after a storm, it may be due to compromised insulation or roof damage. Check your attic insulation to see if it has been affected by water or damage.
9. Debris on the Roof
Tree Branches and Limbs
Storms often bring down tree branches and limbs, which can land on your roof and cause damage. Look for any large branches or debris resting on your roof. Even if the damage isn’t immediately visible, debris can cause problems over time and should be removed carefully.
General Debris Accumulation
Besides tree branches, other types of debris, such as leaves and small objects, can accumulate on your roof. This debris can trap moisture and contribute to roof damage. Regularly clearing debris can help maintain the health of your roof.
10. Visible Damage to Roof Structure
Exposed Underlayment
The underlayment is a layer beneath the shingles that provides additional protection against water infiltration. If shingles are missing or damaged, the underlayment may become exposed. Inspect your roof to ensure that the underlayment is intact and not visible.
Structural Integrity
Check the structural components of your roof for any visible damage or signs of weakness. This includes inspecting the rafters, trusses, and other supporting elements. Structural damage may require professional assessment and repair.
Conclusion
Detecting signs of storm damage on your roof is essential for maintaining its longevity and preventing costly repairs. By keeping an eye out for the indicators mentioned in this blog and performing regular inspections, you can address any issues promptly and ensure your home remains protected. If you notice any of these signs or are unsure about the condition of your roof, it’s best to consult with a professional roofing contractor. They can provide a thorough inspection and recommend the necessary repairs to keep your roof in optimal condition.
Need a Roofing Contractor in Minneapolis-St. Paul, MN?
Established in 2008, K. and M. Construction is your trusted Twin Cities metro area expert for all things exterior residential. We specialize in storm damage restoration, including hail damage repair and metal roof replacement. Our team boasts over 35 years of combined experience ensuring top-notch work on your roof, siding, windows, and gutters. We take pride in exceeding expectations and providing exceptional customer service. Contact us today and let us transform your home’s exterior!
Choosing the right siding material for your home is a crucial decision that impacts both its aesthetic appeal and structural integrity. With numerous options available in the market, each offering unique benefits and considerations, it can be overwhelming to determine which one suits your needs best. This comprehensive guide aims to simplify the process by exploring various siding materials, their characteristics, durability, maintenance requirements, and curb appeal.
Factors to Consider When Choosing Siding Materials
Before delving into specific siding options, it’s essential to consider several factors that will influence your decision:
Durability and Longevity
One of the primary considerations when selecting siding materials is their durability. Different materials have varying lifespans and resilience against elements such as weather, insects, and rot. Understanding how each material stands up to these factors will help you make an informed choice.
Maintenance Requirements
Another crucial factor is maintenance. Some siding materials require regular upkeep, such as painting or sealing, to maintain their appearance and performance. Others are more low-maintenance but might come with higher initial costs.
Aesthetic Appeal
The siding you choose significantly contributes to your home’s curb appeal. It should complement the architectural style of your house and enhance its overall appearance. Consider the color, texture, and style options available with each material.
Cost Considerations
Cost is often a determining factor for many homeowners. The initial cost of siding materials varies widely, and it’s essential to weigh it against long-term maintenance and durability to determine the most cost-effective option for your budget.
Environmental Impact
For environmentally conscious homeowners, the sustainability and recyclability of siding materials may be important considerations. Some materials are eco-friendly and energy-efficient, contributing to a greener home.
Popular Siding Materials
Now, let’s explore some of the most popular siding materials used in residential construction today:
1. Vinyl Siding
Best siding material for durability and curb appeal, vinyl siding is known for its affordability, versatility, and low maintenance. It comes in a wide range of colors and styles, including textures that mimic wood grains or smooth finishes. Vinyl siding is resistant to moisture, fading, and insects, making it a durable choice for many climates. However, it can crack in extreme cold or become brittle over time.
2. Fiber Cement Siding
Fiber cement siding is composed of cement, sand, and cellulose fibers, offering excellent durability and fire resistance. It can mimic the appearance of wood, stucco, or masonry while requiring minimal maintenance. Fiber cement is resistant to rot, insects, and impact, making it suitable for various climates. However, it is heavier and more challenging to install than vinyl siding, requiring professional installation.
3. Wood Siding
Wood siding provides a natural and timeless look, enhancing a home’s aesthetic appeal. Cedar, pine, and redwood are popular choices due to their durability and resistance to insects and rot. Wood siding requires regular maintenance, including staining or painting every few years to protect against moisture and UV damage. It offers excellent insulation properties but can be more susceptible to fire and pests compared to other materials.
4. Engineered Wood Siding
Engineered wood siding combines wood fibers, wax, and resins to create a durable and sustainable option. It offers the aesthetic appeal of natural wood with enhanced durability and resistance to moisture and pests. Engineered wood siding comes in various styles and textures, including lap, shake, and panel designs. While it requires less maintenance than traditional wood siding, periodic painting or staining is recommended to preserve its appearance.
5. Metal Siding (Steel or Aluminum)
Metal siding, typically made from steel or aluminum, is valued for its durability, low maintenance, and modern aesthetic. It is resistant to fire, insects, and rot, making it a practical choice for harsh climates. Metal siding comes in a range of colors and finishes, including corrugated panels or smooth surfaces. However, it can dent or scratch easily, and proper installation is crucial to prevent moisture buildup behind the panels.
6. Brick and Stone Veneer
Brick and stone veneer siding offer a luxurious and durable option for homeowners seeking a classic look. Real brick or stone veneer provides excellent insulation and fire resistance, contributing to energy efficiency and long-term durability. However, it is one of the most expensive siding options and requires professional installation due to its weight and complexity.
7. Stucco Siding
Stucco siding is a traditional choice known for its durability and weather resistance. Made from cement, sand, lime, and water, stucco creates a seamless, textured finish that enhances a home’s exterior. It provides excellent insulation and fire resistance but requires professional installation and periodic maintenance, such as repainting and minor repairs.
Conclusion
Choosing the right siding material involves balancing factors such as durability, maintenance requirements, aesthetic appeal, cost, and environmental impact. By understanding the characteristics of each siding option and evaluating your specific needs and preferences, you can make an informed decision that enhances your home’s beauty and functionality for years to come. Whether you prioritize durability and curb appeal or seek the best siding material for your home, this guide provides a comprehensive overview to guide you through the selection process.
Need a Roofing Contractor in Minneapolis-St. Paul, MN?
Established in 2008, K. and M. Construction is your trusted Twin Cities metro area expert for all things exterior residential. We specialize in storm damage restoration, including hail damage repair and metal roof replacement. Our team boasts over 35 years of combined experience ensuring top-notch work on your roof, siding, windows, and gutters. We take pride in exceeding expectations and providing exceptional customer service. Contact us today and let us transform your home’s exterior!